

<View> and <Text> — camera, microphone, push notifications, biometrics, files — uses an Expo SDK module. The agent picks the module, asks for permissions correctly, and wires it into your screens. This page is what happens under the hood.
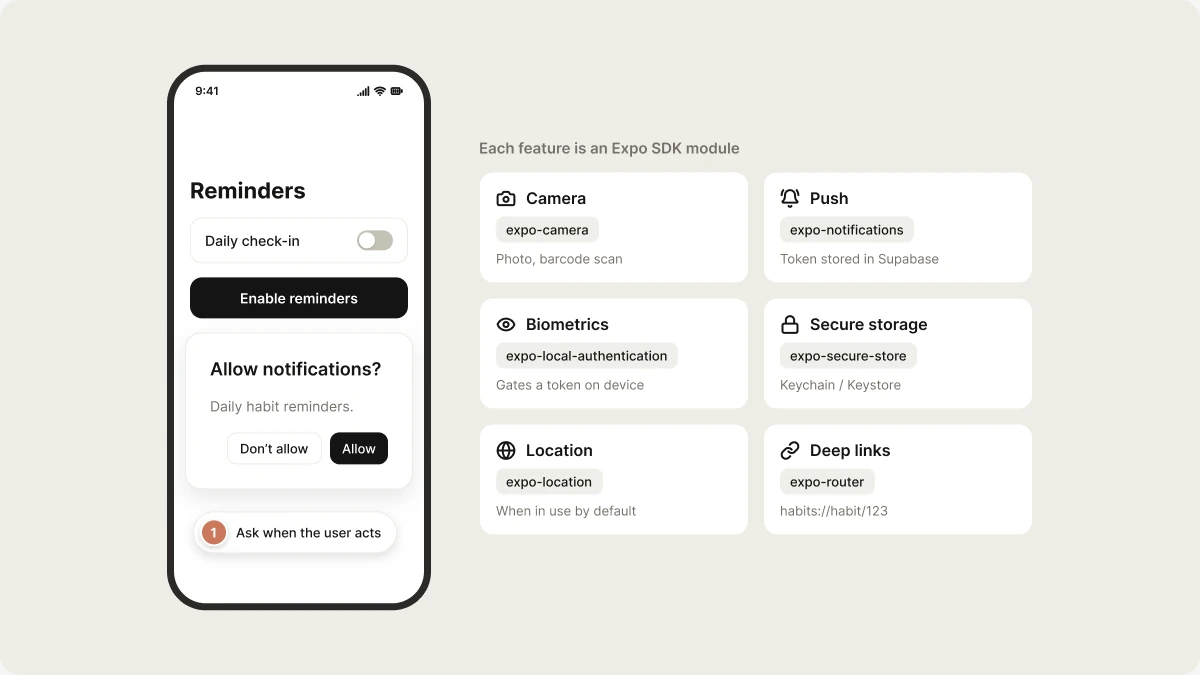
Permissions, the right way
Expo’s permission helpers are wrapped consistently:Camera
Module:expo-camera. Use cases: photo capture, barcode scanning, ID upload.
Push notifications
Module:expo-notifications. Wire-up:
- Request permission on first interaction with notifications (e.g. “Enable reminders”).
- Get the device token (
getExpoPushTokenAsync). - Store the token against the user row in Supabase.
- Send pushes server-side via the Expo push API — easiest from a Supabase Edge Function.
Notifications.scheduleNotificationAsync. No server needed.
Push doesn’t work in the web preview or in iOS Simulator without a paid Apple Developer account. Test on a real device via Expo Go (or a custom EAS build for production).
Biometrics
Module:expo-local-authentication. Use for “Unlock with Face ID” / “Confirm with fingerprint.”
Secure storage
Module:expo-secure-store. Backed by Keychain on iOS and EncryptedSharedPreferences on Android. Use for session tokens, refresh tokens, anything sensitive.
AsyncStorage (also pre-installed) for non-sensitive data — it’s faster and supports larger payloads.
Geolocation
Module:expo-location. Two permission tiers:
- When in use — fine grained, works while the app is foregrounded. Default ask.
- Always — required for background tracking. Triggers an OS-level “always allow” prompt that’s notoriously hard to get past on iOS. Avoid unless the feature genuinely needs it.
Deep links
Configured inapp.json:
habits://habit/123 in any browser or message and Expo Router lands on app/habit/[id].tsx. Universal links (https://habits.example.com/...) need an apple-app-site-association and assetlinks.json published on your domain — the agent will tell you the exact files.
In-app purchases
iOS and Play Store policy require IAP for digital goods. Web checkout (Stripe) is not allowed for unlocking app features. Two routes:expo-in-app-purchases— direct integration with StoreKit / Play Billing. Free, but you handle receipt validation server-side yourself.- RevenueCat (via Connectors) — managed receipt validation, entitlements, analytics. Free up to $10K MTR.
What doesn’t work in Expo Go
A small set of features require a custom EAS build:- Custom native modules (anything not in the Expo SDK).
- Some payment SDKs (RevenueCat works in Expo Go via a config plugin; raw
react-native-purchasesdoes not). - Some push providers other than Expo’s own.
- App Clips / App Extensions.
eas build --profile development and you install the resulting build instead of Expo Go.