

Connect Figma
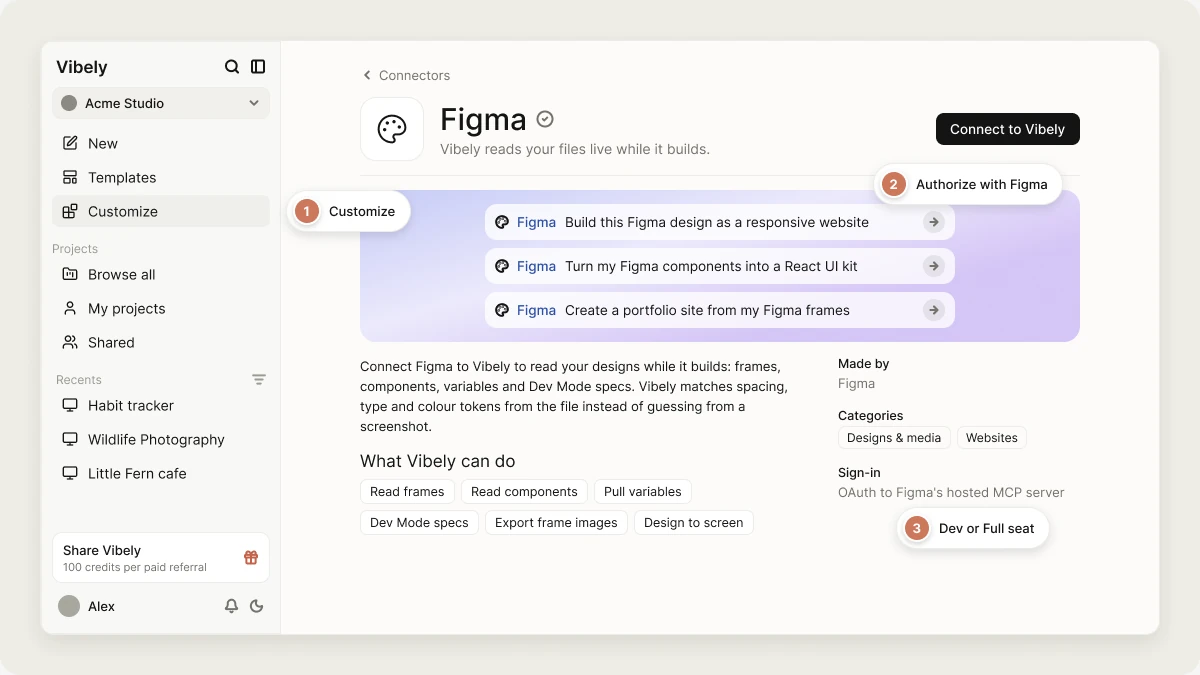
The Figma connector links Vibely to Figma’s hosted MCP server. Once connected, Vibely can read the files your Figma account can open while it builds: frame layout, component structure, the variables behind your design tokens, and Dev Mode measurements. You don’t need to export or attach anything. What Vibely can do with it- Read frames, components, and layout from your files
- Pull variables and design tokens into your code
- Get Dev Mode specs and measurements
- Export images of a frame for reference
- Turn a design into a working screen, for web or mobile
The Figma connector is used while you build. Your published app can’t call Figma through this connection.
Prerequisites
- A Figma account that can already open the file. Vibely sees exactly what you can see.
- A Dev or Full seat in Figma for Dev Mode specs and measurements. With a view-only seat, Vibely gets structure but not measurements.
- Permission to connect connectors in your workspace. See Admin controls.
Set up the connector
1
Check your Figma seat
Dev Mode output needs a Dev or Full seat. Confirm yours first, or specs come back empty and look like a connection problem.
2
Connect Figma in Vibely
Open Customize from the sidebar, go to the Connectors tab, open Figma, and connect it. You authorize in your browser with your Figma account. There’s no API key to paste.
3
Point Vibely at a design
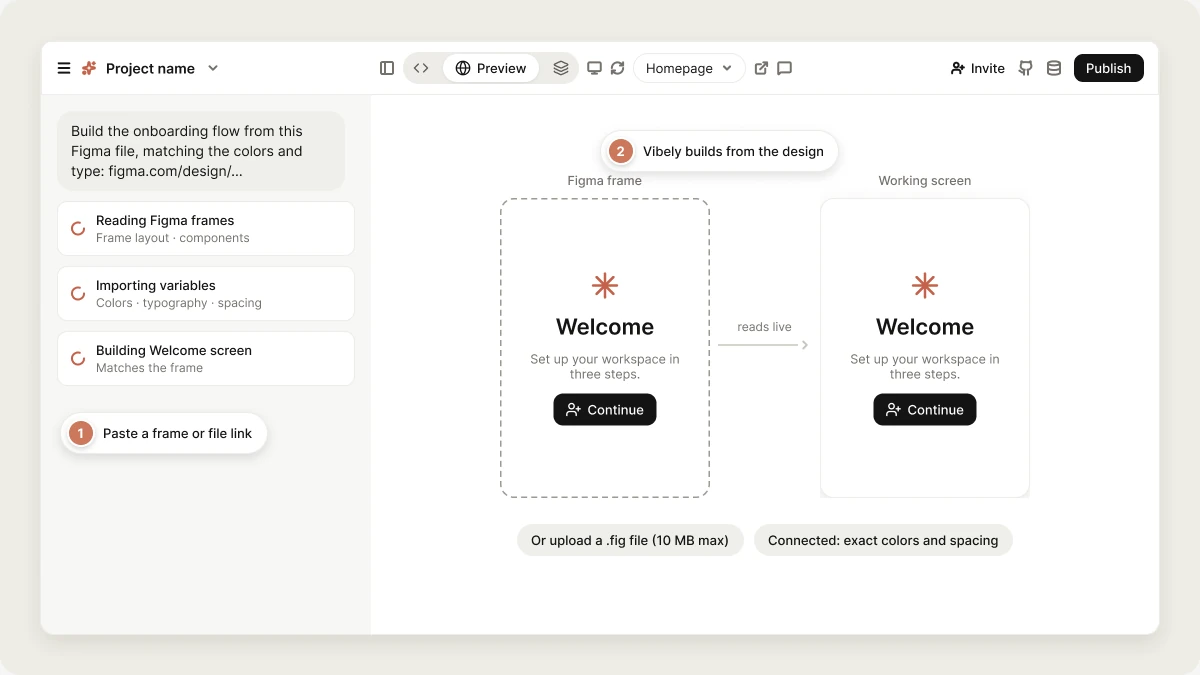
Paste a link to the frame or file in the project chat and describe what you want built.
Manage or disconnect
Go to Customize → Connectors → Figma. Disconnecting stops Vibely from reading your files. Code already generated from a design stays as it is.Upload a .fig file
Upload a Figma file to give Vibely the content it can read from it: frame and layer names, text, and component names. It’s fast and needs no setup, but it doesn’t recreate your designs pixel for pixel.1
Save the file from Figma
In Figma, open your design file and choose File → Save local copy. The
.fig file saves to your computer.2
Add it to your message
Drag the
.fig file into the prompt box, or click + and choose Upload files or photos. Files can be up to 10 MB.3
Describe what to build
Limitations
- Build-time only. Design data is context for building. Nothing from the connection ships in your app.
- Only what your account can open. A file shared with your team but not with you is invisible to Vibely.
- Seat-dependent specs. Dev Mode measurements need a Dev or Full seat.
- Frames and components translate best. Prototype interactions and plugin-generated layers don’t translate into code the same way.
- .fig uploads are text-level. Vibely reads names and text from the file, not its visual layout.
FAQ
What's the difference between connecting Figma and uploading a .fig file?
What's the difference between connecting Figma and uploading a .fig file?
Connecting Figma gives Vibely live access to your files, including layout, components, variables, and specs, so it can build screens that match. A
.fig upload gives Vibely the names and text it can read from one saved file. Use the connector when you want Vibely to build from your actual screen designs.Do I need the Figma desktop app?
Do I need the Figma desktop app?
No. The Figma connector uses Figma’s hosted server, so it works from the Vibely web app with your browser.
Does using Figma cost credits?
Does using Figma cost credits?
Connecting Figma and uploading a file are free. The message that uses the design is priced like any other Build mode message.
Can I use both methods together?
Can I use both methods together?
Yes. For example, connect Figma for live inspection and attach a
.fig file or screenshots for extra context.Related topics
Design guidance
Pick a look before the first build.
Connectors
How connectors work in Vibely.
Miro
Build from your Miro boards.
Design systems
Reusable design rules for web projects.