

- Share a project with a group, so a whole team gets access in one step.
- Restrict a published app to specific groups, so an internal tool or dashboard only opens for the teams that need it.
Groups are available on the Business plan.
Create and manage groups
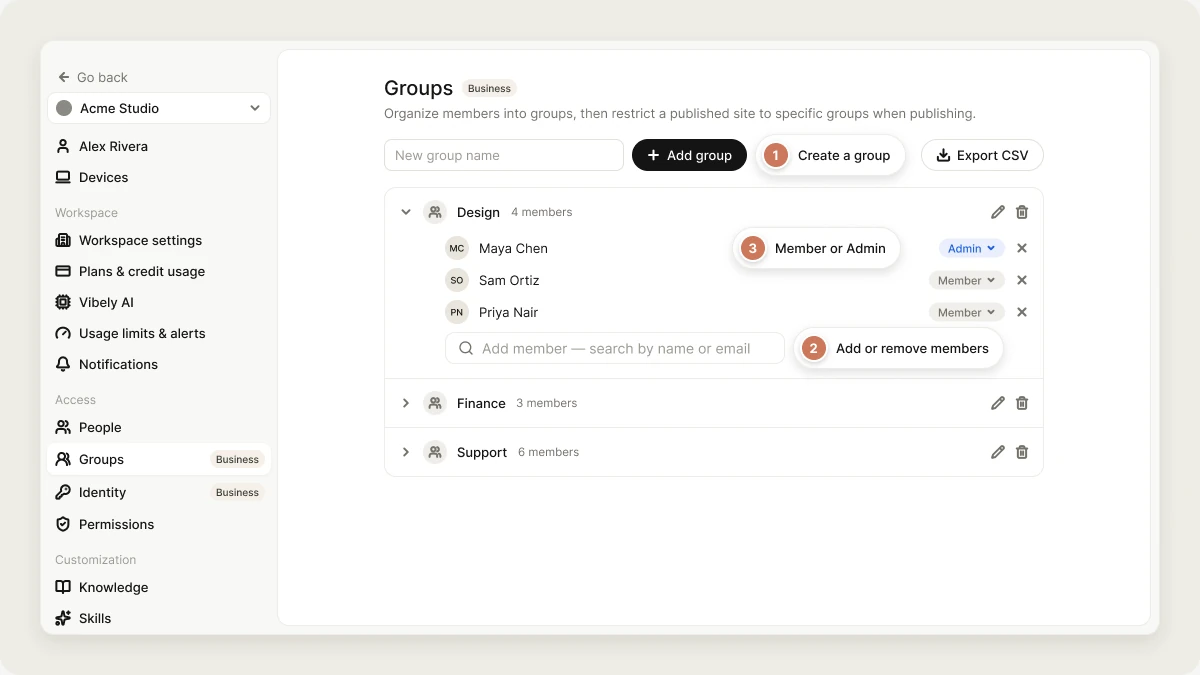
Workspace owners and admins create and manage groups in Settings → Groups. A group’s own Admins can also manage its members (see Group roles). Every member can see the list of groups and how many people are in each.Create a group
- Go to Settings → Groups.
- Type a name in New group name.
- Click Add group.
Manage group members
- Go to Settings → Groups and expand the group.
- To add someone, use Add member — search by name or email and pick a workspace member.
- To remove someone, click the remove button on their row.
Group roles
Each group member has a group role, Member or Admin.
Only workspace owners and admins can make someone a group Admin or remove a group Admin, so a group Admin can’t promote themselves or anyone else. Creating, renaming, and deleting groups also stays with workspace owners and admins.
Rename or delete a group
Use the rename and delete buttons on the group’s row. Deleting a group removes it and every project access it granted. It doesn’t remove anyone from the workspace.Export group membership
Click Export CSV on the Groups page to download every group and its members.Share projects with groups
Instead of inviting people to a project one at a time, you can give a whole group access.Add a group to a project
1
Open the Share project dialog
Open the project and click Invite in the editor header. The Share project dialog opens.
2
Pick a group
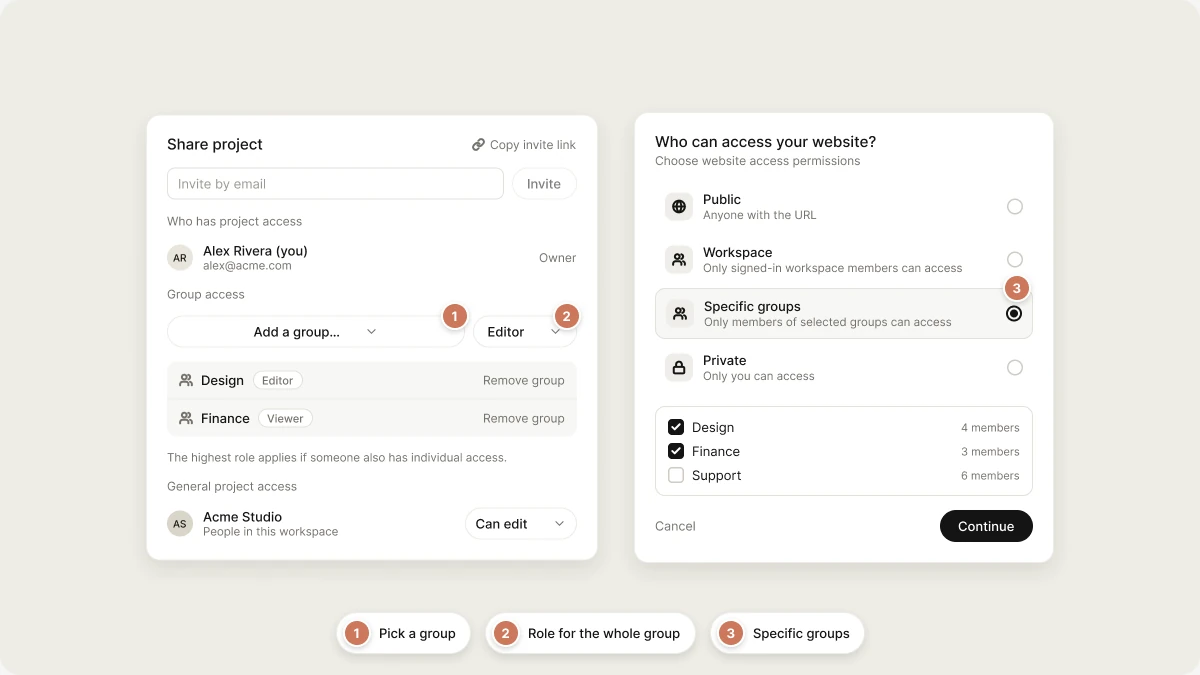
Under Group access, choose a group from Add a group….
3
Choose a role
Pick Admin, Editor, or Viewer. Every member of the group gets that role on the project.
Remove a group from a project
In Share project → Group access, click Remove group on the group’s row. Members of that group lose access unless they also have access another way.How group and individual access interact
If someone has access both individually and through one or more groups, the highest role applies. Removing a group never affects people who were also added individually.Publish to specific groups
You can restrict a published web app so that only members of chosen groups can open it.1
Open the publish dialog
Open the project and click Publish.
2
Choose who can access your website
Under Who can access your website?, select Specific groups.
3
Pick the groups
Tick the groups that should have access. You need at least one.
4
Publish
Publish, or publish your changes if the app is already live.
Groups and SCIM
Groups are managed in Vibely only. Your identity provider can’t create or change them over SCIM. SCIM has its own three fixed groups that map to workspace roles. See SCIM.FAQ
Which plans include groups?
Which plans include groups?
The Business plan.
Who can create and edit groups?
Who can create and edit groups?
Workspace owners and admins create, rename, and delete groups. A group’s Admins can add people to that group as Members and remove Members. Every member can see which groups exist.
Can I add someone from outside the workspace to a group?
Can I add someone from outside the workspace to a group?
No. Invite them to the workspace first from Settings → People.
What happens to a group's access if I delete it?
What happens to a group's access if I delete it?
Every project access it granted is removed at the same time. Members keep any access they have individually.
Why can't I add a group to my project?
Why can't I add a group to my project?
Only the project’s owner can grant group access, the workspace must be on Business, and the group must belong to the project’s workspace.
Related
People
Manage workspace members and roles.
Publish your web app
Choose who can see a published app.
Collaboration
Invite people to a single project.
SCIM
Provision members from your identity provider.